This may seem complicated, but it’s not. Once you walk through these 12 steps, you’ll see how easy it is to post a story—leaving you plenty of time to write more of them!
First: you must be registered to post a story to the archive. If you haven’t registered, CLICK HERE to create your account. If you’ve already registered, then LOGIN to your account to begin the process of posting a story.
1. Once you have registered or logged into your account, choose the +NEW button at the very top of your browser window to begin adding your story to the archive (you can also select POST or MEDIA from the dropdown menu that appears when you hover over +NEW depending on whether you want to add a post or media—but to add a post you don’t specifically need to choose it from the dropdown menu; just click the +NEW and voila). See graphic below:
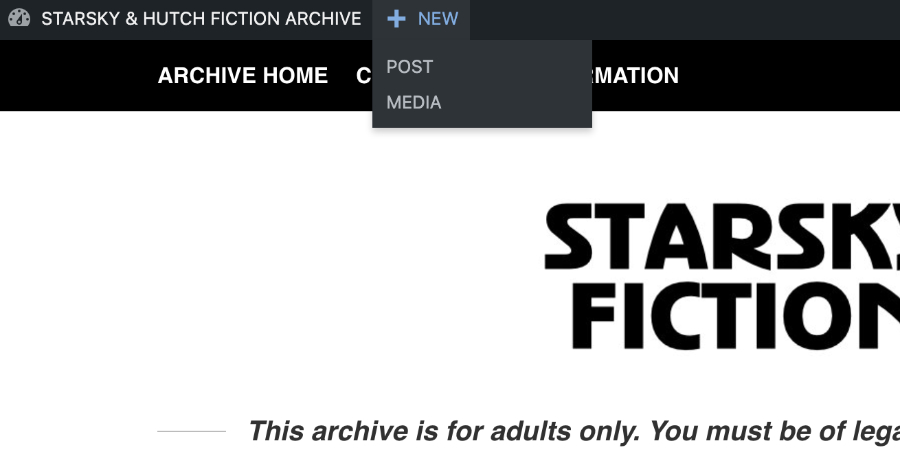
2. +NEW will take you to the form where you will begin inputting the parts of your story:
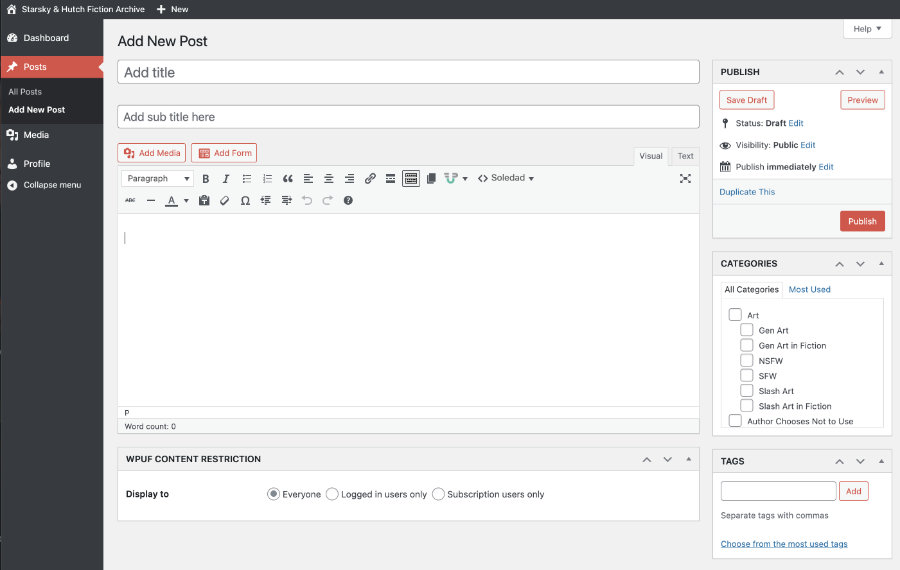
3. Enter the title of the story in upper-and-lower case in the ADD TITLE field (fill in THE SUB TITLE HERE field if you have one).
4. In the CONTENT box (it isn’t identified, but it’s the big empty box on the page), first enter a brief summary of your story.
5. After the summary, enter any story notes you may want the reader to know.
6. After the summary and notes, add a horizontal line to separate the summary from the story. [If you don’t see a second row of editing options, refer to the graphics below. On the top row at the end of the editing options is a toggle button. Click that button and another row of editing options will appear.]
In the second row of editing options, you will find the HORIZONTAL LINE button; click it to add the line to the page:

^ Above: Toggle button when closed

^ Above: Toggle button when it’s open
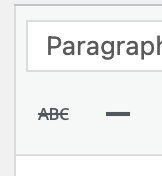
^ Above: The horizontal line button is that flat horizontal line to the right of the small ABC
7. Enter the body of your story. Just copy your story from its source and then paste it into the CONTENT box in the form. [Please edit and correct any spelling errors. They will show up with a red line underneath so you can easily spot them.] Make sure all chapters/headers are centered.
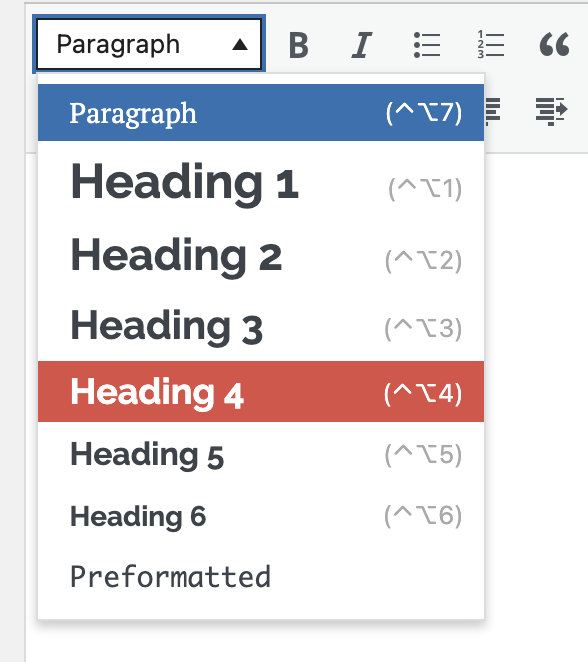
If you have chapters, you can create a TABLE OF CONTENTS as you go along. Just enter the name of each chapter, center it, select it, and choose HEADING 4 (TOC) from the PARAGRAPH dropdown menu; the site will create the TOC automatically from there. See graphic below:
8. CATEGORIES: Once your story is edited as per the instructions above, you will now categorize your story. The CATEGORIES menu is in the sidebar to the right of the page. Under CATEGORIES, first select FICTION. [This has to be selected so the system will know to put this story in the FICTION box on the home page so it appears as a premiere.]
Next, select either GEN FIC or SLASH FIC. Then select all subcategories that apply.
[PLEASE NOTE: The category, INSPIRED BY, is for stories inspired by Starsky and Hutch, such as the Harry and Johnny stories. This means Starsky and Hutch are not in these stories. So if you have a Starsky and Hutch story that is inspired by a song, for example, the INSPIRED BY category does not apply.]
See the graphic below for CATEGORIES:
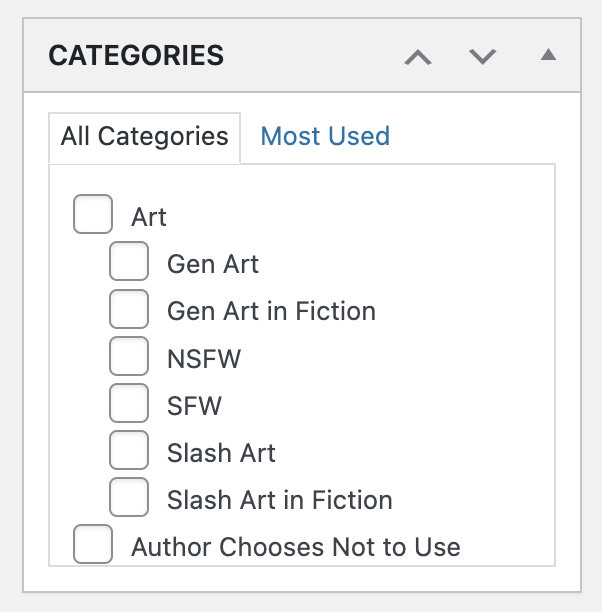
9. TAGS: The TAGS menu is in the sidebar to the right of the page. Under TAGS, click CHOOSE FROM THE MOST USED TAGS. A list of the most commonly used tags to choose from, both gen and slash, will appear.
Please choose from this list first. Refrain from adding tags if you can.
If you are adding an existing named series, type in the series name and select it from the list when it pops up. If it’s a new series, type the series name into the text field and ADD it to the tags.
If you have a tag not in the list and you feel strongly that it needs to be there, please add it and an archive admin will review.
See the graphic below for TAGS:
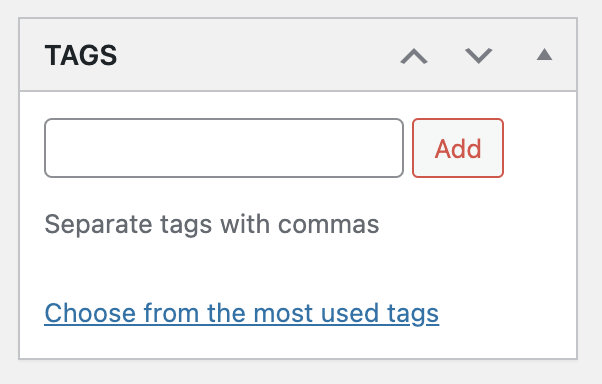
10. Next add the FEATURED IMAGE (you can find its menu at the bottom of the sidebar) and it looks like this:
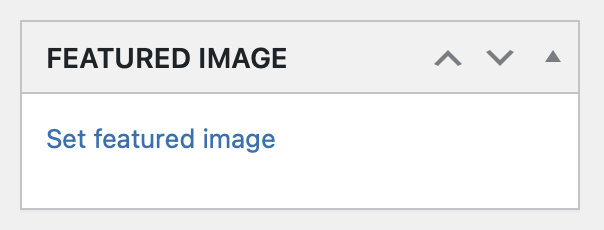
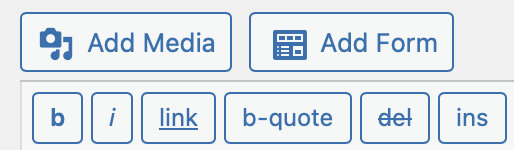
The featured image IS NOT for the pictures you will add as part of or throughout your story. You will add those images using the ADD MEDIA button above the PARAGRAPH formatting tools; see this graphic for its location:
The featured image actually labels your story GEN FICTION or SLASH FICTION on the front end of the archive so readers know going in what to expect.
If you’re an artist purely adding art, you will choose GEN ART or SLASH ART.
Drag, download, or otherwise save the images (the featured images are at the bottom of this page) to your computer and then upload (some or) all of them to your MEDIA LIBRARY. You can upload them using the +NEW button at the very top of your browser window (see graphic below) or via your dashboard.

^ Above: Upload media via the +NEW
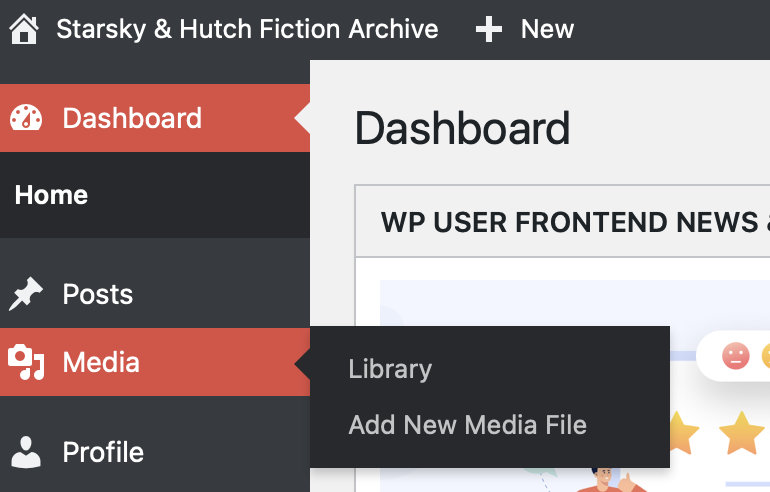
^ Above: Upload media via your dashboard
Note: Once you have added them to the MEDIA LIBRARY, you don’t have to add them again. You will simply choose the FEATURED IMAGE of your choosing from your MEDIA LIBRARY.
11. Once your story has been categorized, tagged, and the featured image has been added, it’s time to save your story as a draft or publish it. In the sidebar is where you will find those options:
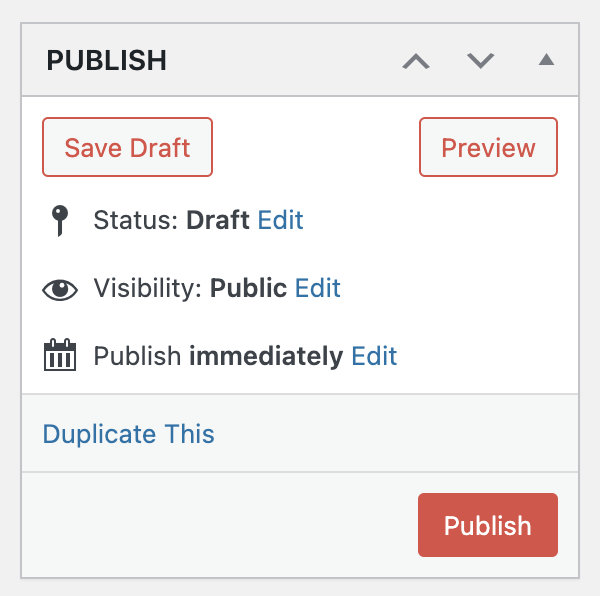
12. If you save your story as a draft, you can edit it until you are ready to publish. When you’re ready to publish, just click the PUBLISH button and it will immediately go live to the archive.
You’re done! An archive admin will review your submission. If she has any questions, or needs you to make any corrections/additions, she will contact you.
To log out, simply go to the front end of the archive (you can get there by clicking on STARSKY AND HUTCH FICTION ARCHIVE in the upper left corner of your browser window) and choose the LOG OUT item from the dropdown menu under your account icon in the upper right corner of your browser window.
Thank you so much for helping us create a one-stop warehouse of Starsky and Hutch fan fiction and art.